Wednesday, October 24, 2012

Week Five: Animals “At the Zoo” Continued


Week Five: Animals “At the Zoo” Continued


Student Examples of Monkey and Elephant pages
 

Time allotment
Activity
Materials Needed
5 minutes
Greet the students; have each student give his/her introduction. (Name, age, from, like and dislike)
 
 
10 minutes
Review all zoo animals, their spellings and translations.
 
Watch Gogo “What Colour is This?”
 
 
·         Gogo Cartoon
 
10 minutes
Distribute the Zoo Books to the students.
 
Paper Monkeys:
Every student needs 4 small strips of brown-colored paper, a small circle and a larger oval shape (see the Monkey Body Template below) to create their monkey; instructors must prepare before club begins!
 
Each student has a body piece, a head piece, and four slender pieces of brown paper for legs and arms. After students have glued the body and head pieces into their Zoo books, they must fold each of the slender pieces several times to create an accordion effect; these become the “springy” legs and arms of their playful monkeys.
 
Next, students will use a brown marker to make tail, ears and face. After drawing the ears, tail, and face on their monkey, the students must write the caption “This is a brown monkey.”


·         Monkey Body Template
·         Monkey body, head and legs cut out for each student (brown paper)
·         Brown marker
·         Glue
 
10 minutes
Handprint Elephants:
 
Students will trace their own hand into their Zoo Books, with their fingers pointing downward. The fingers of the hand will become legs, the thumb will be the elephant’s trunk, and then they will glue a paper ear (see template/instructions below) onto their elephant. Students may choose the color of their elephant; then they must write the caption “This is a(n) ___________ elephant.”

Elephant Ear Template


·         Pencils
·         Markers
·         Colored paper “ears”
5 minutes
Collect all Zoo Books, clean tables and put away supplies. Dismiss students.


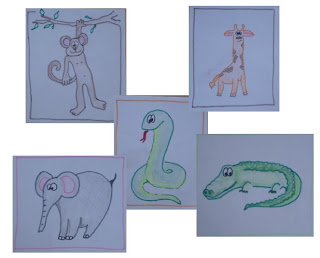
Student Examples: Zoo Booklets

Tuesday, October 23, 2012

Week Four: Animals “At the Zoo”


Week Four: Animals “At the Zoo”
 
Zoo Animal Flash Cards
 

Time allotment
Activity
Materials Needed
10 minutes
Review the student introductions and vocabulary words from the previous week—“Animals on the Farm.”
Show Gogo cartoon about animals at the zoo.  
 
·         Gogo Cartoon
10 minutes
Introduce animals that live “At the Zoo.”
Key vocabulary :
·         Monkey
·         Elephant
·         Snake
·         Crocodile
·         Giraffe
·         Fish
·         Bear
·         Lion
·         Tiger
·         Camel
 
Tape the illustration cards to the board, and practice spelling the names of each of the animals using the names of the letters (not just the sounds). Call on individual students to read the words aloud.
 
·         Zoo animal flash cards
10 minutes
Put all the cards on the table along with two signs: “At the zoo” and “On the farm.” Have students organize the animals into groups. Then, call on individual students to speak full sentences: “A _______________ (animal) lives ______________(on the farm/at the zoo).”


·         All animal flash cards
·         Signs: At the zoo; On the farm
 
10 minutes
Construct foldable books:
·         Give each student 3 sheets of white paper
·         Fold all papers in half
·         Place the papers one inside the other, with a small amount of glue in the creases
·         Squeeze the pages together to create a “book”
 
 
·         Paper
·         Glue
10 minutes
On the cover of their books, have each student write “At the Zoo” and his/her name.
 
On the first page of the book, students must write all the zoo animals and their Ukrainian equivalents. Collect the books for more work the next week.
 
·         Markers


Student examples of zoo booklets

First page of zoo booklets

Monday, October 22, 2012

Week Three: Animals “On the Farm”


Time allotment
Activity
Materials Needed
8 minutes
Review the following:
My name is ____________.
I am ____________.
I live in ________________.
 
Use the paper ball toss method to have all students introduce themselves aloud.
Have students also say what they like and don’t like.
 
·         Paper ball
·         Model sentences written on board
·          
10 minutes
Introduce animals that live “On the Farm.”
Key vocabulary :
·         Horse
·         Rabbit
·         Chicken
·         Cow
·         Duck
·         Goat
·         Pig
·         Rooster
 
Tape the illustration cards to the board, and practice spelling the names of each of the animals using the names of the letters (not just the sounds).
 
·         Farm animal flash cards
15 minutes
Give each student a square sheet of paper; model for them how to create an origami rabbit. After each student has created their rabbit, use markers to create a face on the rabbit.
 
Student example: origami rabbit


·         Origami rabbit instructions
·         Paper
·         Markers
10 minutes
Review the farm animals’ names.
Create a model sentence on the board: “A _______________ lives on a farm.” Call on students individually, holding up different cards, and have the student say the full sentence. For example, he/she must say “A cow lives on a farm” rather than just “cow.”
 
·         Model sentence on board
·         Flashcards
5 minutes
 
Students stand and say their last sentences:
I like ___________________( a new animal from today) but I don’t like _______________( a new animal from today).


Tuesday, October 16, 2012

"First Steps of English" Week Two: Like and Dislike


Week Two: I like, I don’t like
Example "Verb" Flash Cards and Matching Activity
 

Time allotment
Activity
Materials Needed
8 minutes
Review the following:
My name is ____________.
I am ____________.
I live in ________________.
 
Use the paper ball toss method to have all students introduce themselves aloud.  Students can also watch Gogo cartoon: #2 What’s His Name
 
 
·         Paper ball
·         Model sentences written on board
·         Gogo cartoon #2
10 minutes
Introduce new focus vocabulary for verbs.
Have students repeat and match the meaning to the appropriate picture.
 
Students can write the new words in their exercise books (if they have brought them).
 
·         Verb flash cards
10 minutes
Write the following sentences on the board:
I like _______________ but I don’t like ___________________.
(мені подобається_________, але мені не подобається _________________.)
 
Have students verbally construct and recite sentences on what they like and do not like to do.
 
·         Chalkboard or whiteboard
·         Chalk or markers
15 minutes
Give students each a sheet of white paper. Have them fold the paper into four boxes. In the first box, they must write their introduction (as seen in the first row above); in the second and third boxes they must write and illustrate “I like ____________.”; in the last box, they must write and illustrate “I don’t like _________________.”  (See examples) This is called a "Four Corners" Activity.
 
·         White paper
·         Markers
5 minutes
Get the students in a circle for one last time before they go home to review their introductions and their likes and dislikes verbally.  (You may wish to use the paper ball toss method.)
 
·         Paper ball

Student Example: Four Corners Activity

All student work is displayed in the classroom